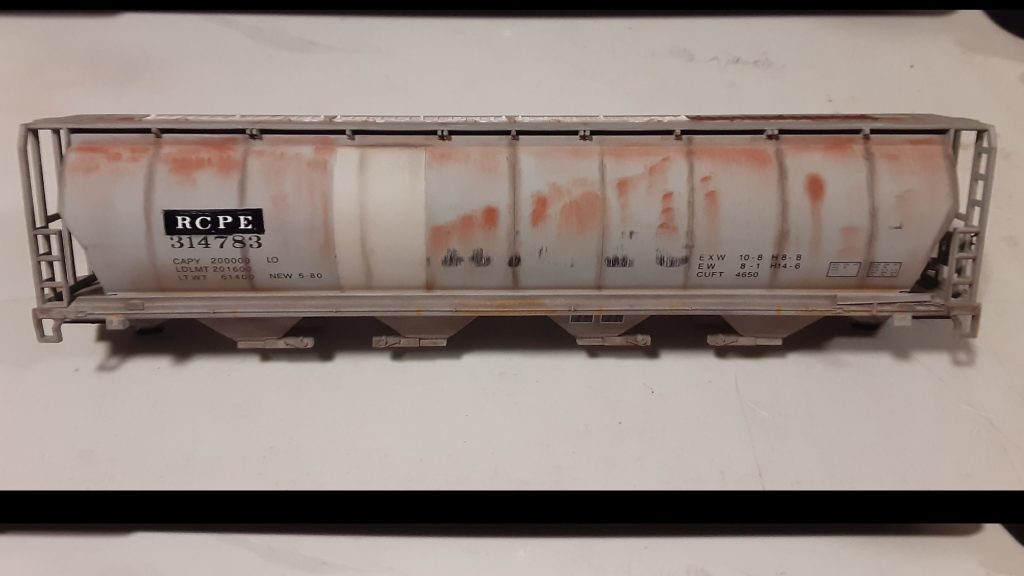
Here’s an overview of how I weathered and patched a basic Bachmann cylindrical 4 bay hopper as a local RCPE (Rapid City, Pierre & Eastern) road car for my club’s HO scale layout.
TOOLS AND MEDIUMS:
While not everyone likes powders, I think they can be some of the best products for weathering. I choose powders because I personally don’t like using airbrushes. This is mostly due to the associated cleaning and the need for a dedicated booth or area which I do not have.
My powder assortment includes products from A.I.M. (now Monroe Models), Bragdon Enterprises and Tamiya. I also use an assortment of Tamiya X and XF line paints, Humbrol and basic craft paints for highlights, patches and tagging. I have been using Tamiya spray paints and their TS-80 flat clear almost exclusively with excellent results for the past few years now. The TS-80 flat clear is lacquer based but does not wash out the powders like Testors dullcote or others I’ve used previously. Model Master lusterless clear used to be my go-to.
I also use an assortment of brushes from Hobby Lobby or Michael’s Crafts, specifically the Royal & Langnickel brand with a cushion above the bristles. I have also acquired a few ELF brand cosmetic brushes such as their concealer and foundation brushes. I use micro brushes of various sizes in conjunction with the cosmetic brushes to create varying effects on the car body.
FIRST STEPS:
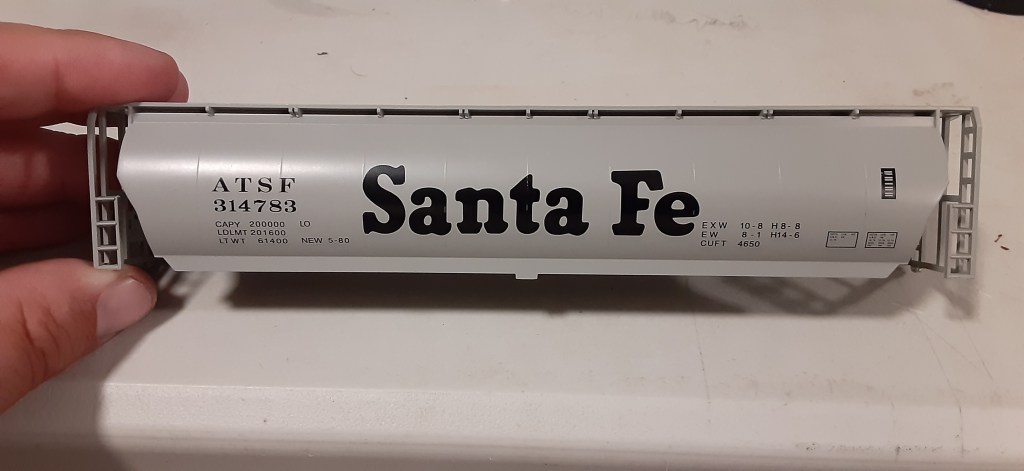
Before doing anything, I found a few cars that were close to what I had in mind. I decided to drive the 3 miles over to the RCPE yard in town for more inspiration. The local road has a large fleet of these ex-Santa Fe cars but there weren’t any exact. I ended up spotting a few cars close enough and went home. I also use images found on rrpicturearchives, where there is typically an assortment of angles.
My first step on this and nearly all my projects is to disassemble the car as much as possible. If doing a locomotive, the disassembly is subjective to how much I plan to weather it. This specific Bachmann car took me a bit of time to take it apart without damage. The end ladders are also stuck into the car floor and are tricky to remove.
Getting to the disassembly, I try to make a plan before starting to weather. This helps determine how much I need to disassemble the model or not. As mentioned above, locomotives are more finicky for a variety of reasons. If I can weather a locomotive with the handrails on even better.
PREP FOR WEATHERING:
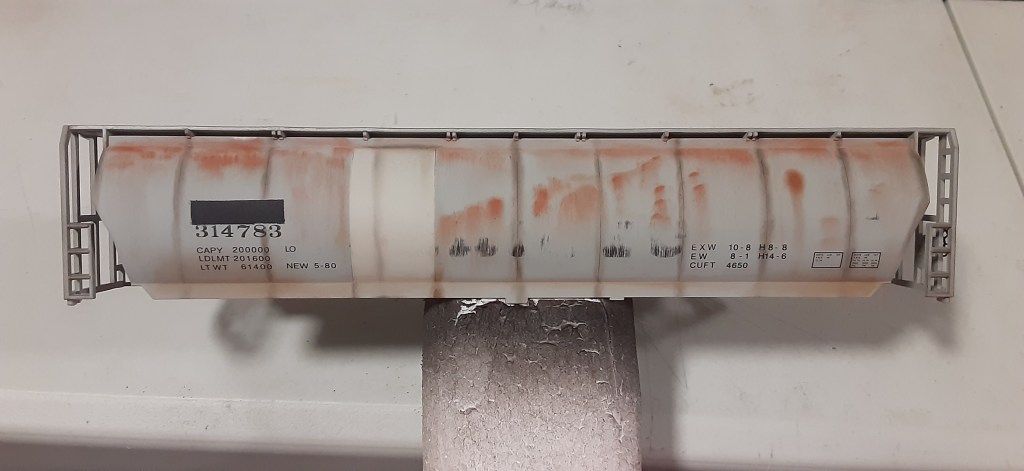
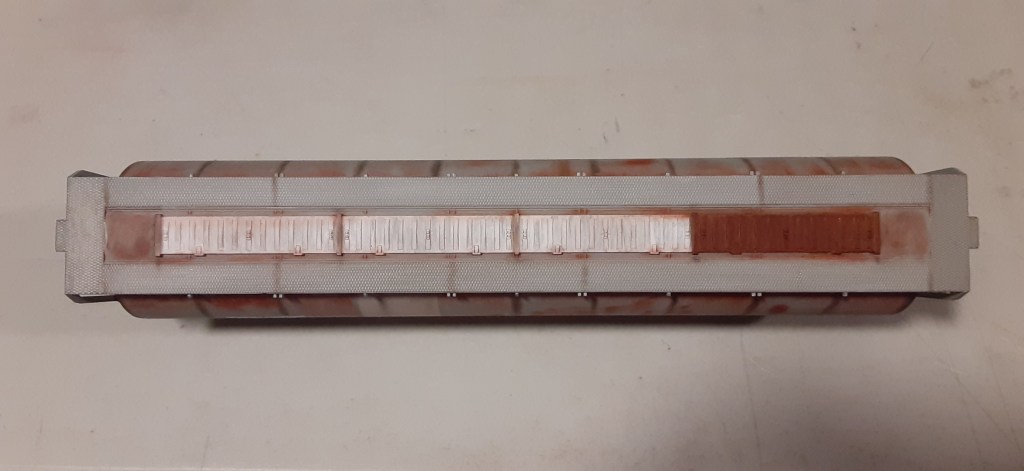
I started by using 800 grit sandpaper to sand down the large Santa Fe lettering. It didn’t take long to get through the lettering as Bachmann’s printing on their cars is thin. Working from the top down, I sanded off most of the lettering and in some areas went through the gray base paint which left random patches of the raw plastic car body in an off-whiteish color.
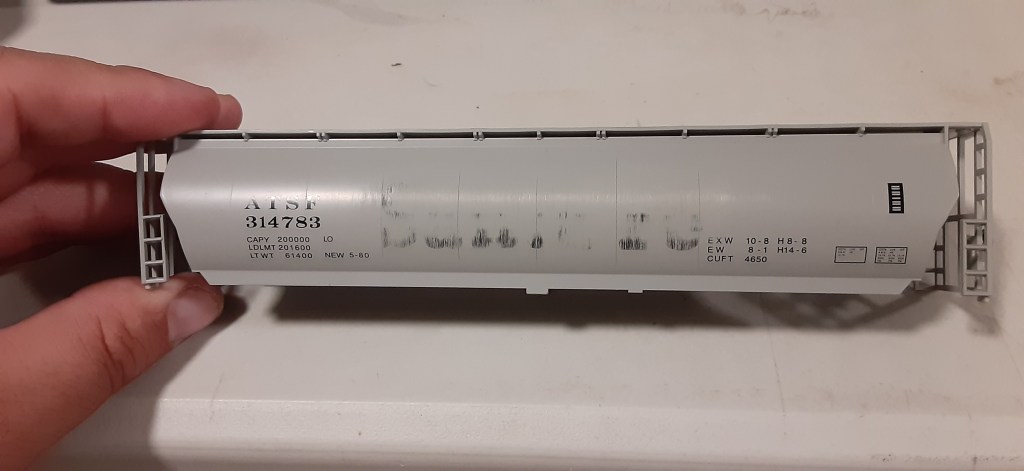
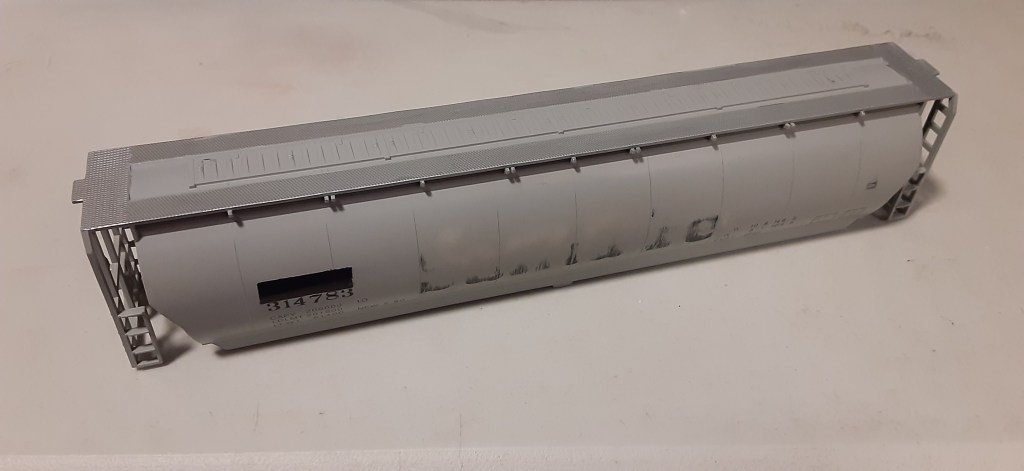
Once I was happy with the fade and a few other areas that were faded, I masked off the car and left a single panel exposed. Many of these cars have had a panel or two repaired/replaced and I wanted to create that look. To emulate the look, I selected a shade of gray spray paint just a touch lighter than the car body. I sprayed the panel by slowly building up the color over 4 light passes then let it dry overnight.
Once dry, I unmasked the car side and gently sanded the edges of the panel to knock down the thickness and keep powders from accenting the hard edge.
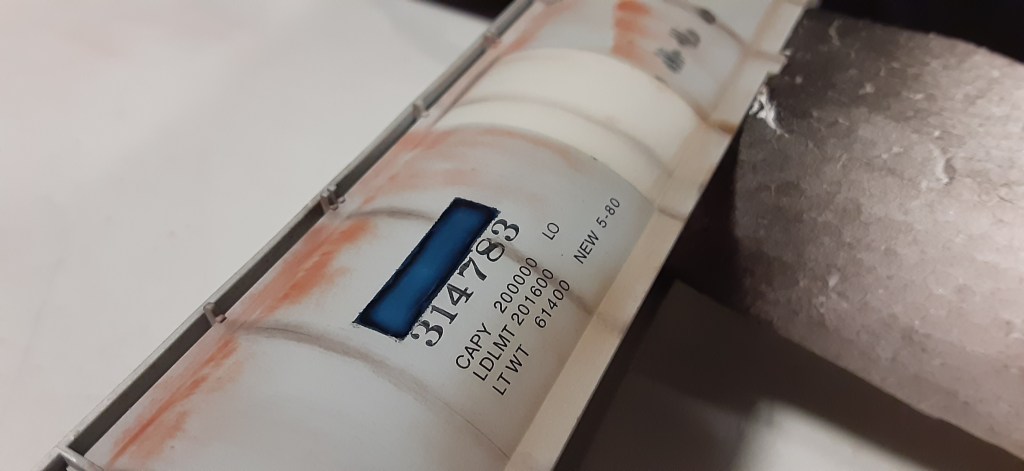
For the reporting mark patch, I sanded off the factory printing and using scraps of 3M blue painters’ tape, I masked around the original ATSF markings. A basic black Sharpie was all I needed to color the area and fill the inside of the small mask. This creates a faded paint appearance without additional work, I did the same for both sides.

The final step to prepare the car for applying powders was to spray the entire body with Tamiya TS-80 flat clear. Doing a base coat of flat clear provides tooth for powders to grab, it also helped blend in the previously sprayed panel. I wait about 30 minutes at a minimum before applying any powder or wash.
WEATHERING:
I mostly used Bragdon medium rust and a touch of dark rust on this car. The rust was applied with the ELF cosmetics concealer brush in a soft side-to-side motion while dragging downwards to create a random look. I built up the color in 3 layers with the top third being darkest and fading lighter to the bottom third.
The panel lines, lower sill and underside got a gentle dusting of A.I.M. dark earth powder. I used a regular size microbrush on the panel lines to keep the lines thin. I also chose a ¾” standard brush to dust the underside and afterward dusted the sill.
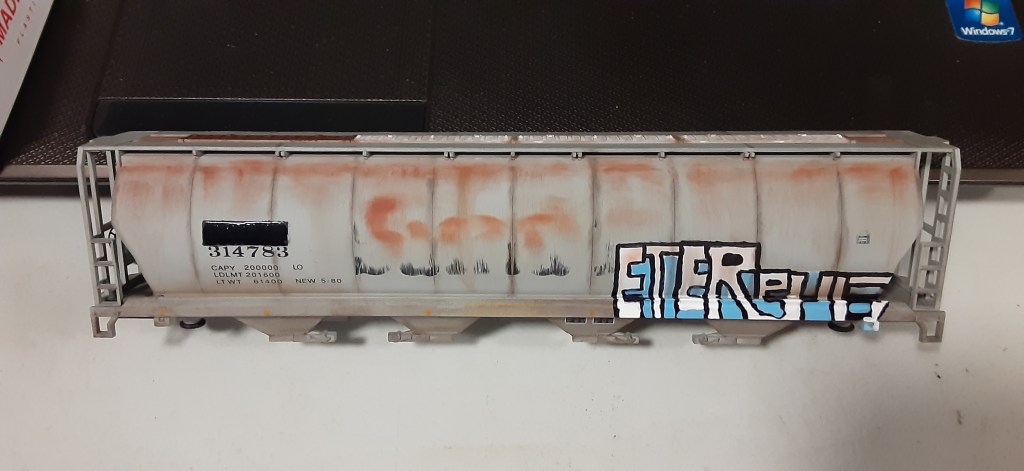
I hand painted the graffiti, while not based on any prototype image it’s just a basic arrangement of random large block letters. I used a pencil to draw an outline, traced the outline with an ultra-fine black Sharpie and filled them in with white craft paint on a fine microbrush. I used a sky-blue chalk marker to accent the letters. After about 20 minutes everything was dry enough to clean up the black Sharpie outline. I used the same ¾” brush to dust over the graffiti and soften the colors some.
PATCHING:
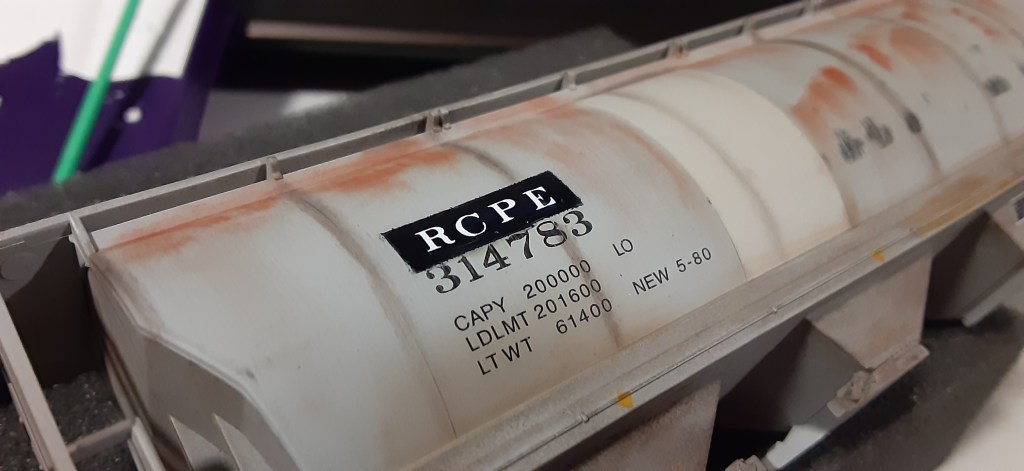
For the new reporting marks, I brushed Micro Gloss over both black patches and let it dry for around 12 hours. Using individual Microscale white letters I applied the RCPE reporting marks. This step offered an opportunity to more closely match the prototype where the stenciling is not square. Once the decals were placed and blotted, I brushed them with Solvaset and let the area cure for about 24 hours. I sealed the new lettering by brushing them over with a light coat of Micro Gloss then let dry for another 12 hours.
FINAL TOUCHES:
The hatches were painted with a brush using white craft paint. I kept one clean and painted it with matte Humbrol signal red colored over with non-metallic gold to duplicate the oxidized red look other Santa Fe cars have. Before these paints were completely dry, I used a ¾” standard brush to dust them and obtain a grimy effect. I also touched up the walkways with some to accent them as well.
Making the trucks blend in was straight forward on this car. I masked the bolster top flange and backs of each truck where the wheels fit. I then sprayed them with RustOleum ultra flat black and highlighted the faces with light gray powder from A.I.M.
To complete the project, I sprayed all parts with 2 light coats of Tamiya TS-80 flat clear to seal everything, waited overnight then reassembled the car adding metal wheels and Kadee #5s.
Michael ‘Mike’ Thoreson
