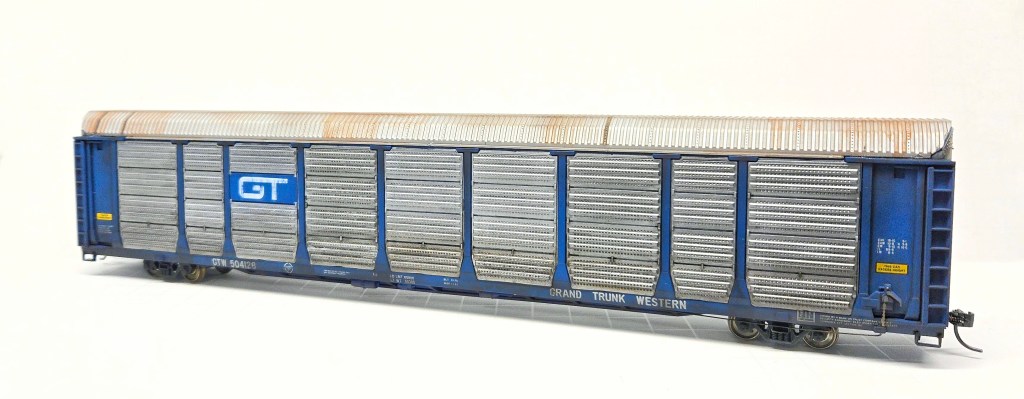
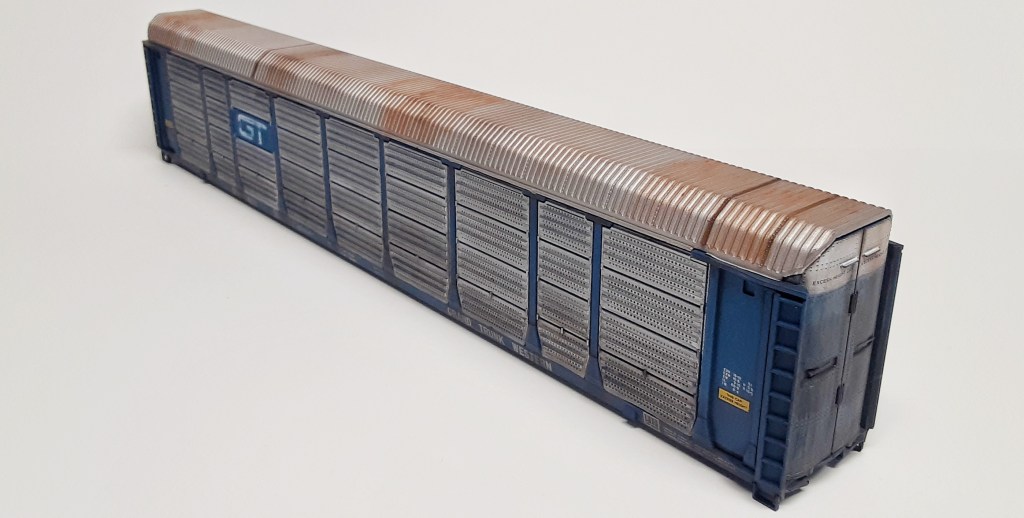
Here’s how I weathered this older Walthers autorack HO scale kit during the assembly.
OVERVIEW:
This older Walthers kit was still shrink wrapped when I found it second hand, talk about new-old-stock! I find these older kits to be conducive for weathering candidates because you can weather them in much smaller pieces versus handling the whole model. This generally reduces the chance of breaking off detail parts or leaving fingerprints that only show up when applying powders.
I used an assortment of techniques on this project because I wanted to try washing the brighter metallic parts to match the look of a prototype photo I found.
PREP FOR WEATHERING:
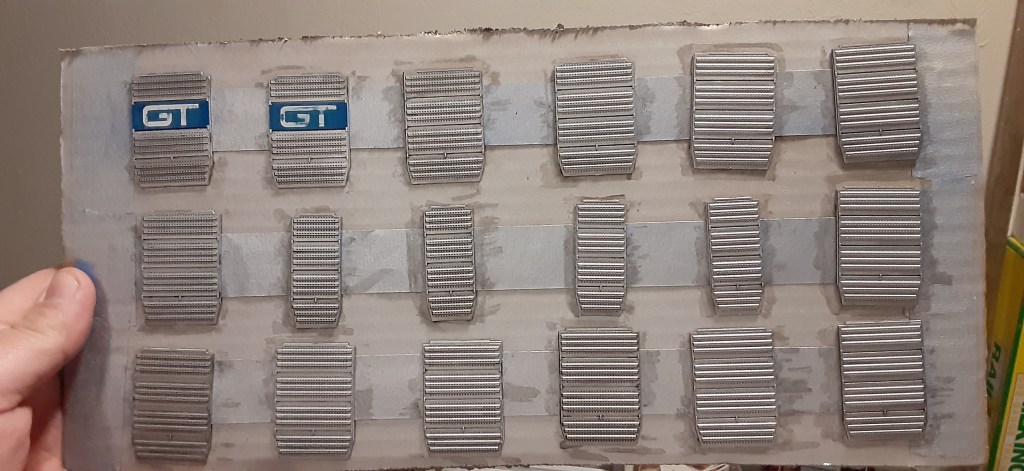
My first step was to select side panels that matched the prototype photo I had and remove them from their casting sprues. Thankfully there wasn’t much flash clean up resulting in a nice fit and finish. The panels in the kit were blue and that needed to be changed.
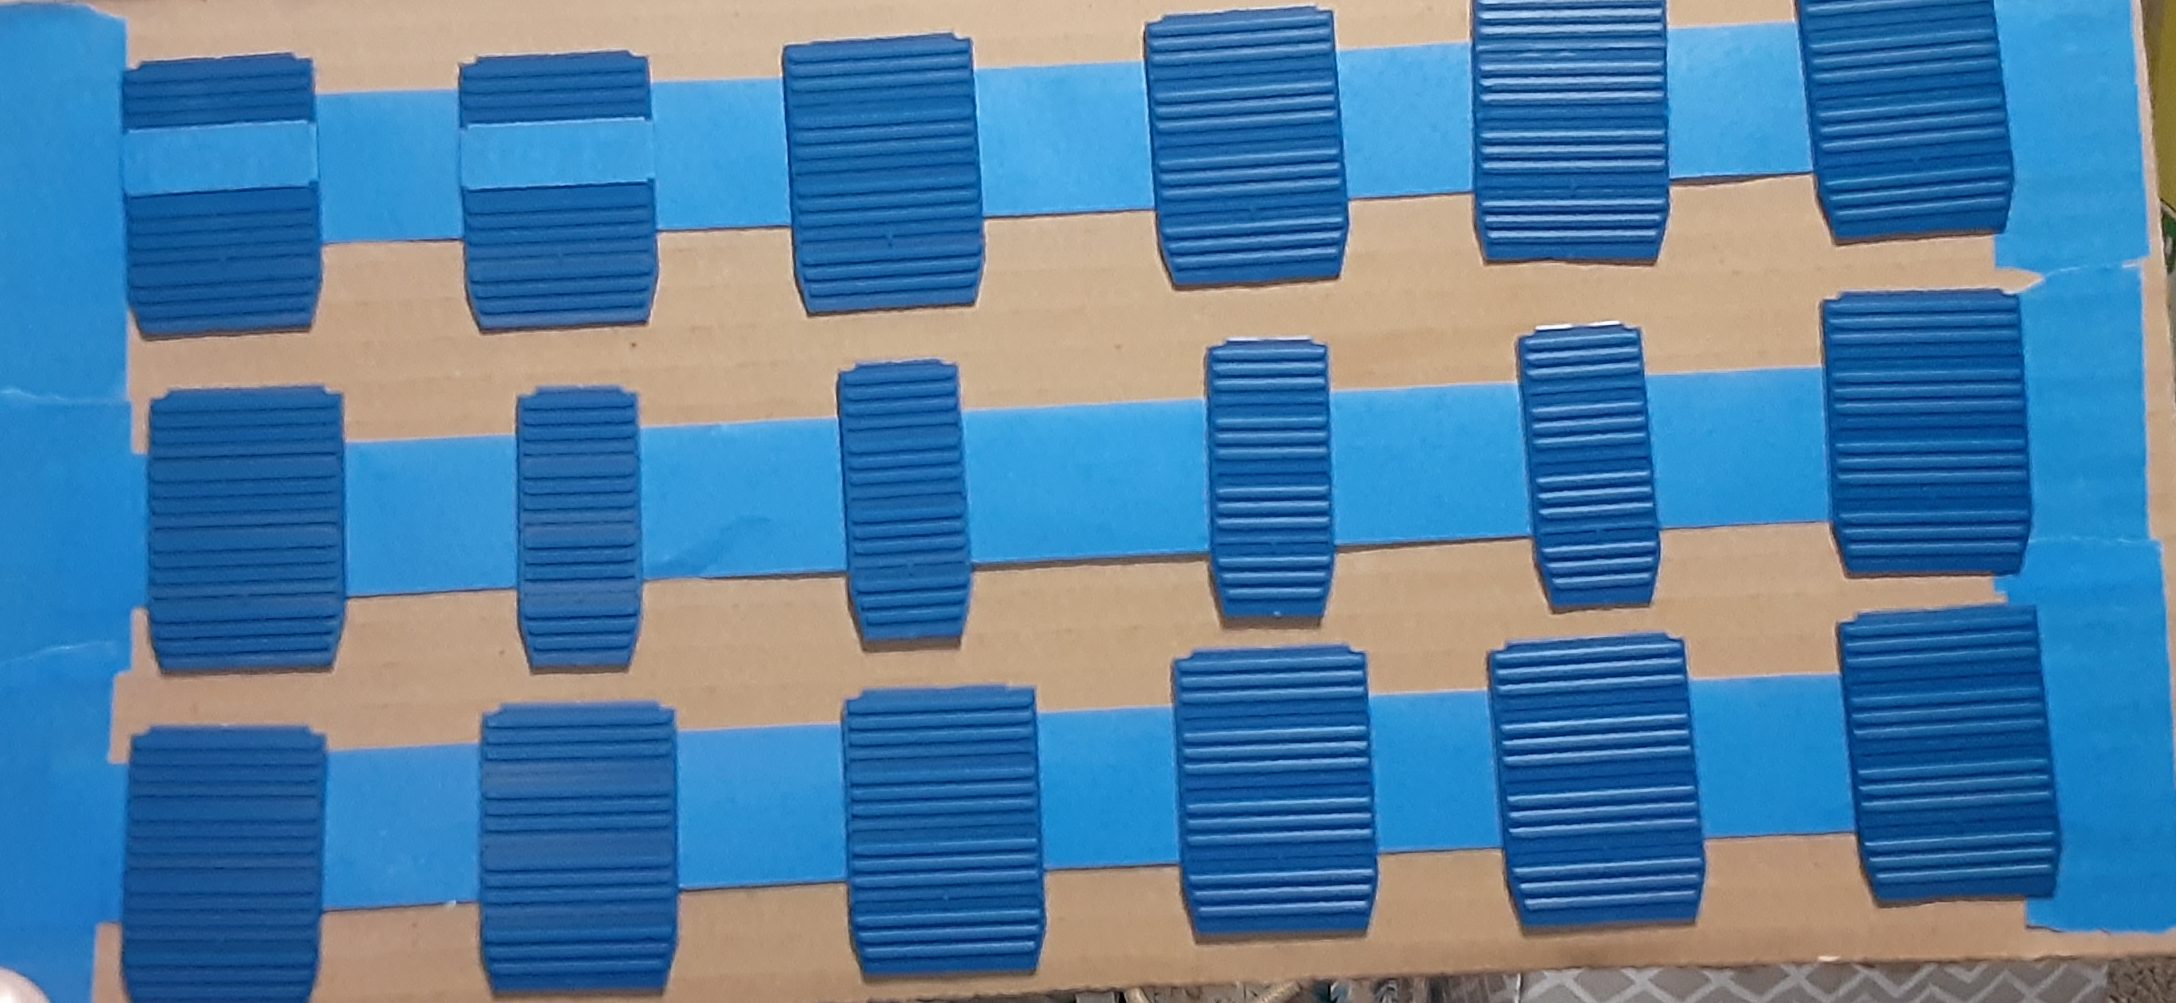
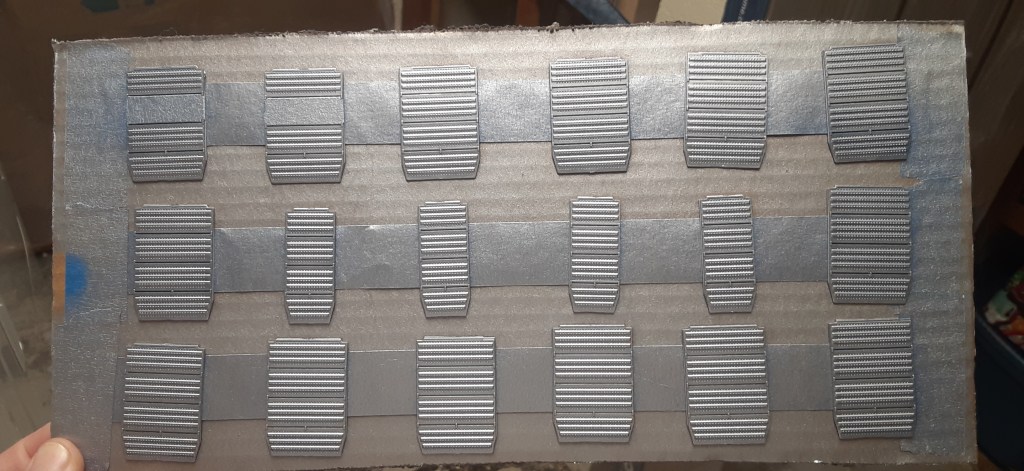
Using a sturdy piece of cardboard, I laid out some masking tape adhesive side up and stuck the panels down for painting. I only had to mask off where the herald was printed before spraying. I sprayed only the outside faces of the panels with Tamiya TS-76 mica silver for a good base color then followed up with Tamiya TS-80 flat clear.
The flat clear knocks down the original bright silver and gives a good tooth for weathering powders.
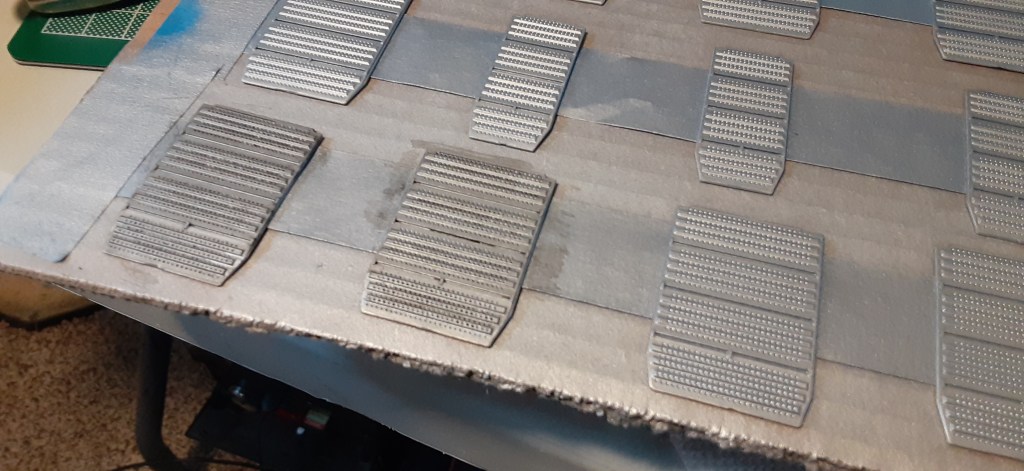
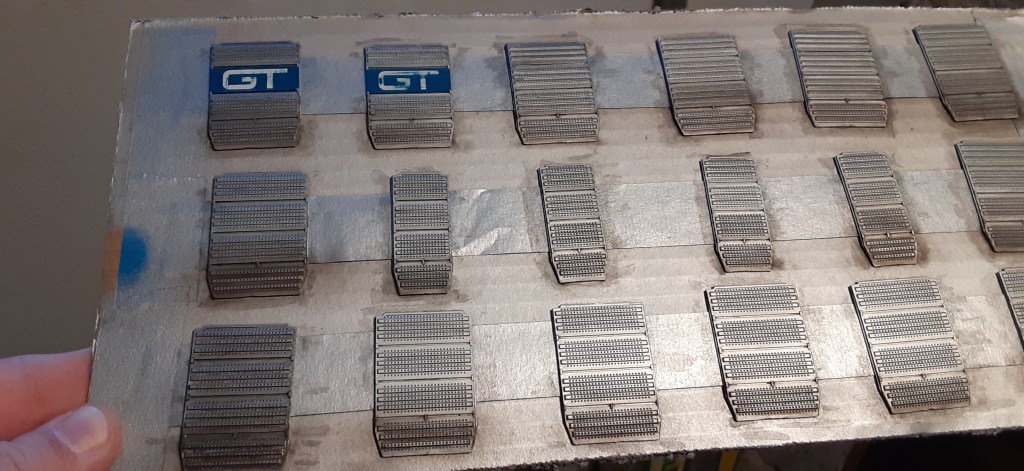
Using Tamiya black panel wash as a starter, I dipped a Q-tip the wash and randomly applied it across each panel starting along the bottoms and working upwards to fade it out. I found that keeping all the panels stuck to the cardboard while I did this made things much easier to keep everything contained to the cardboard.
WEATHERING:
When the wash dried overnight, I came back with a 1/2″ medium brush and lightly applied Bragdon soot powder across the panel, again starting at the bottom and fading towards the top creating the road grime effect. Once I was happy with how the panels looked a coat of Tamiya TS-80 flat clear was sprayed to seal them.
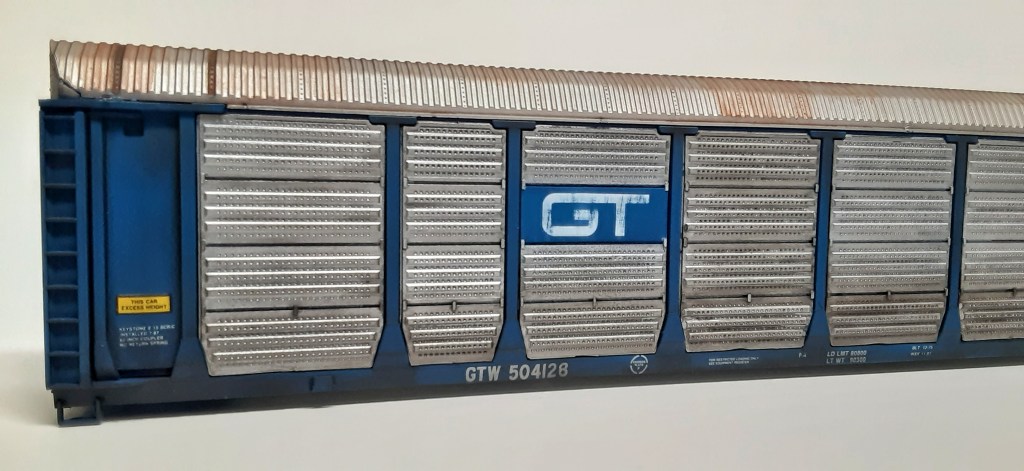
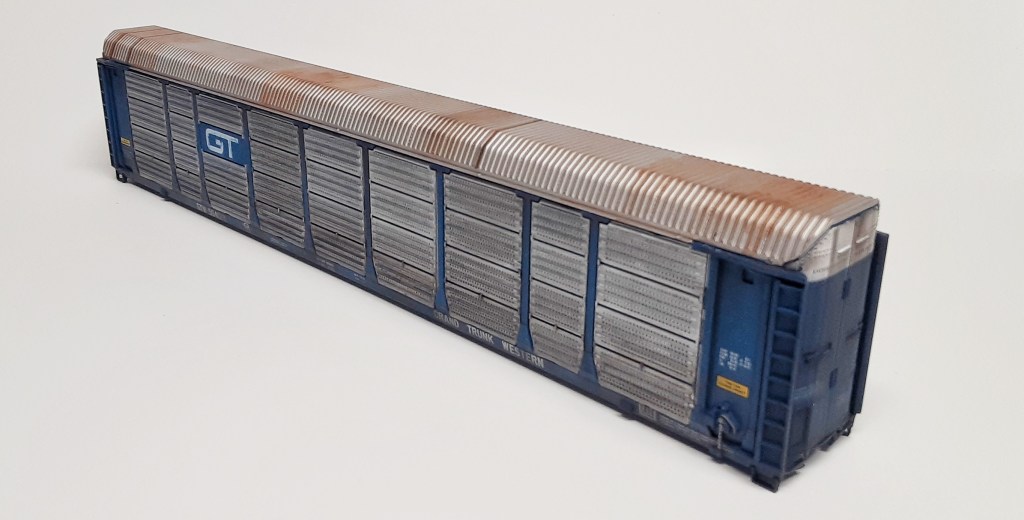
I started out wanting to fade the blue to a more sun bleached baby blue shade, but the method I planned on was not going to work. I chose to skip that step, instead sprayed the entire car body with a medium-heavy coat of Tamiya flat clear and let it dry to a point where it was not tacky, but still had a lacquer odor (about 3 minutes). I then gently rubbed my thumb over some of the smooth surfaces, this lightly frosts the flat clear and created the sun fade I was wanting.
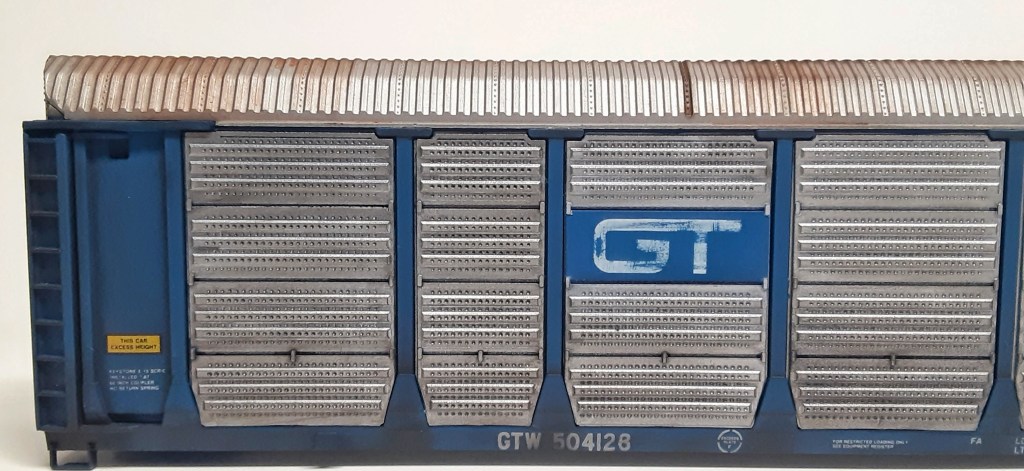
Working on the car frame I decided to re-numbered it as well. For this car, I pulled the bristles off an old microbrush creating a fine pencil tip, dipped it in some white craft paint and carefully applied paint to change the factory printed 3 into an 8.

Using a 1/4″ short bristle angled brush I lightly applied A.I.M. dark earth powder along the lower edge along the frame. This step took longer because the frame is narrow and I tried to keep the powder in place. Once happy I used the same angled brush upwards to drag the powder up the frame sides. I used the same powder for the car body and ends. applying it more heavily in lower areas where road grime spray would build up from various cars over years.
For both panels that have the herald I used 600 grit sandpaper and gently worked the letters randomly until I achieved the worn look.

ASSEMBLY, part 1:
When the frame and car body were done, I used Loctite CA gel sparingly across the back of each panel to glue them in place. Before applying any glue I test fit each panel to ensure fitment. Starting with panels that had a herald and were end or side specific I glued them in their proper placement, then randomly selected remaining panels from my cardboard palette for the empty spaces. I let the CA cure for about an hour then came back with my Tamiya TS-80 flat clear and sprayed the entire car (minus roof).
FINISHING THE ROOF:
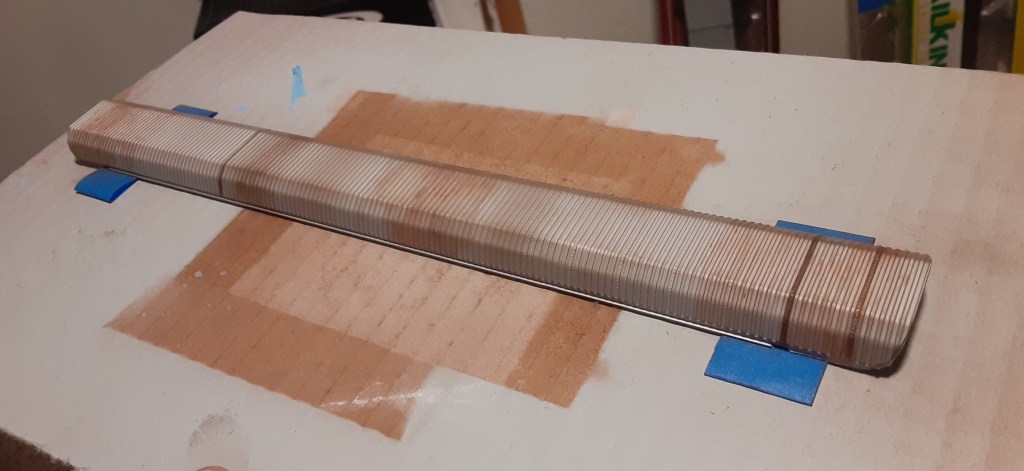
The roof was an opportunity to use a new to me product. To start I sprayed a light mist of Tamiya TS-80 flat clear over the factory silver finished roof. Next, using an ultra soft blush makeup brush dipped in Bragdon medium rust powder, I gently brushed across the part, staying parallel to the ribs and from one end to the other. It took a total of 4 passes to get the desired effect. Take your time when building up powder, the harder edges will create a highlighting effect that a contrasting color will appear unrealistic.
ASSEMBLY, part 2:
These older cars tend to warp and some can bow inwards badly, this car was bowed inward. To remedy this I cut a couple pieces of heavier styrene the proper inside width of the car to use as braces. Doing this step was not really needed as the roof ended up taking out most of the bow, but it sure gives the car sides a solid feeling when handling it. I ended up adding extra weight before attaching the roof with gel type CA.
Once the car sides were good to go, I applied CA along the roof edges where it sits down inside the car body. It took a little persuasion to fit the roof to the car, but it made a big difference going slowly. Once in place, the only way to keep it from popping was to weight the roof down using my six 1-2-3 blocks. Nearly 30 hours later and the full weight of six blocks the roof was in place without any gaps.
FINAL TOUCHES:
On the underside did a quick brush of A.I.M. dark earth and grimy black then sealed it. Most of these details can’t be seen when on the tracks unfortunately. For the trucks, I masked and sprayed them with RustOleum ultra flat Camo black and while tacky dusted over each side frame with A.I.M. light gray powder then sealed with flat clear. I did not have any metal wheels on hand during this project initially, otherwise they would have been included. The car has wheels now, but they are not weathered as of this writing.
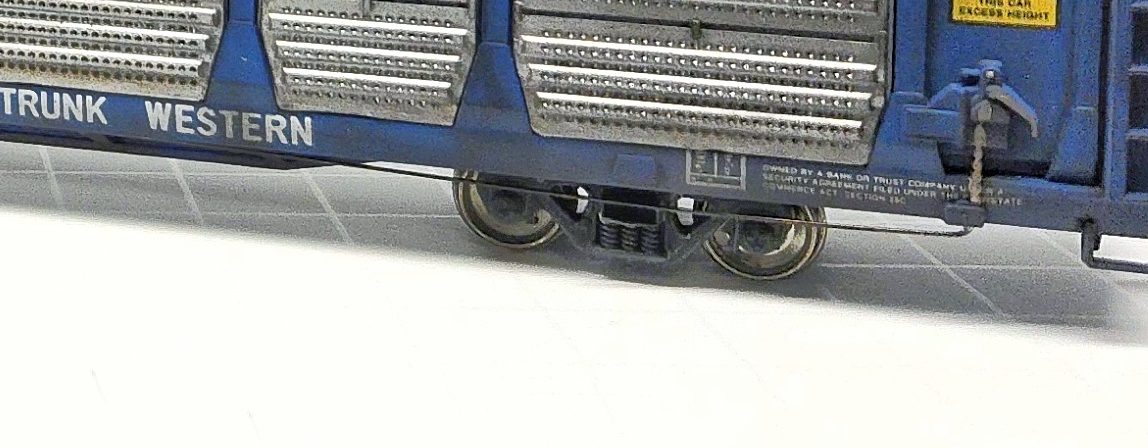
As seen in the photo above, the molded and separately applied brake detail isn’t much, especially when molded in the same color as the car body. To make this small detail pop, I used a silver Sharpie paint marker and highlighted the chain and lever. I touched it before the marker paint fully dried to dull it slightly.
The last thing I added was a short piece of .010″ brass wire to finish out the brake equipment from the lever to frame. I painted it black before gluing it in place and called this car done.
