This assembled Accurail kit was begging to be weathered prototypically.
I was asked to weather this car for my local hobby shop train guy. Since it’s a local road to us, he asked to go as prototypically as possible.
OVERVIEW:
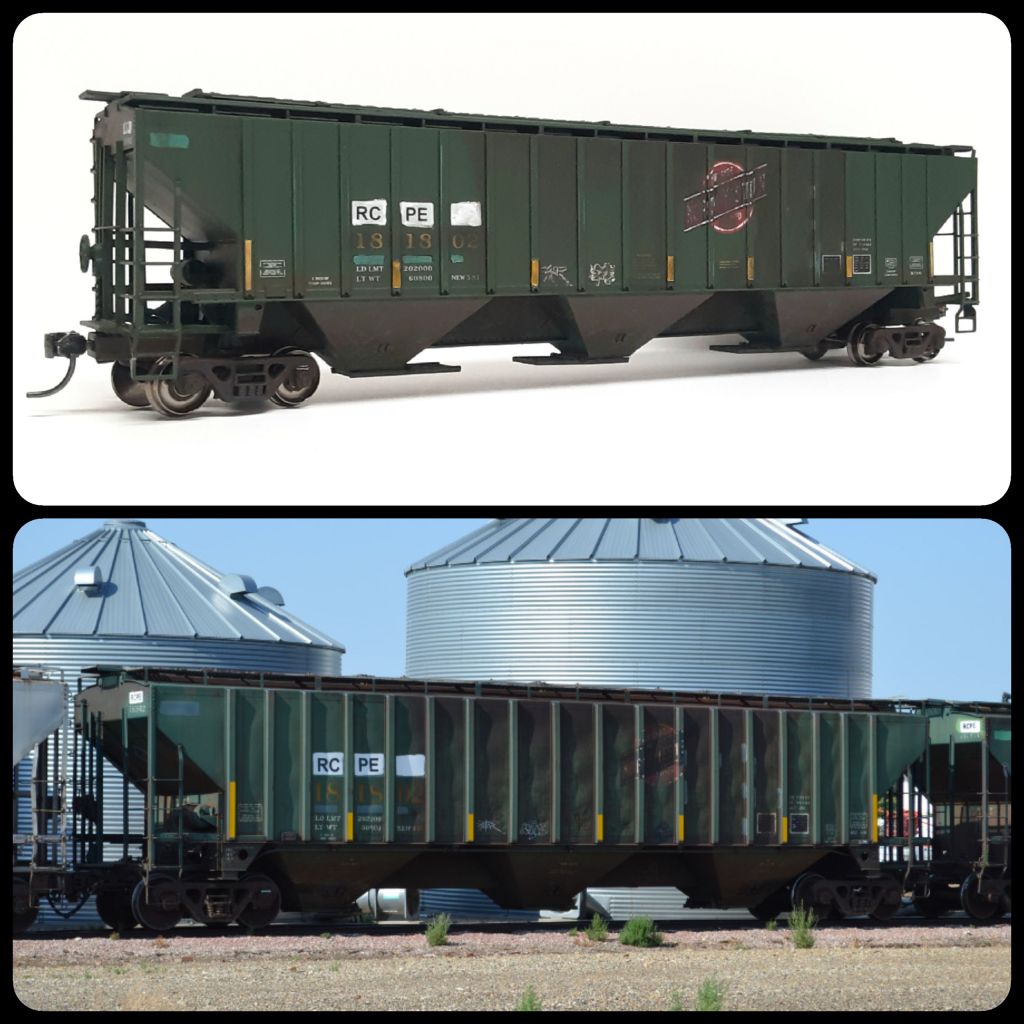
A quick backstory on these Accurail cars – A few of my local modeler friends and fellow club member put in the time to have Accurail produce a minimal run of these hoppers in ex-CNW factory patched for RCPE (Rapid City, Pierre & Eastern – formerly DME) which is our local road. Knowing the folks behind this made this project a little more special.
My process:
I looked for a prototype photo because the end goal was to get as close as possible. Thanks to rrpicturearchives I found one before the site became wonky. There was something off between the cars but I couldn’t figure it out until I finally noticed the conspicuity stripes differed than the factory printed ones. That had to change, at least on the one side.
My first step is almost always the same, I sprayed the car with Tamiya TS-80 flat clear to give the surface some tooth to hold powders.
To remove the printed stripe I used 600 grit sand paper and slowly sanded them off. I used a super fine microbrush to apply some thinned Testors yellow enamel to replace the stripes. If I was to do it over, I would use Humbrol 99 matte yellow to get a closer match with the factory stripe color. However, the shade is virtually not noticeable after powders were applied.
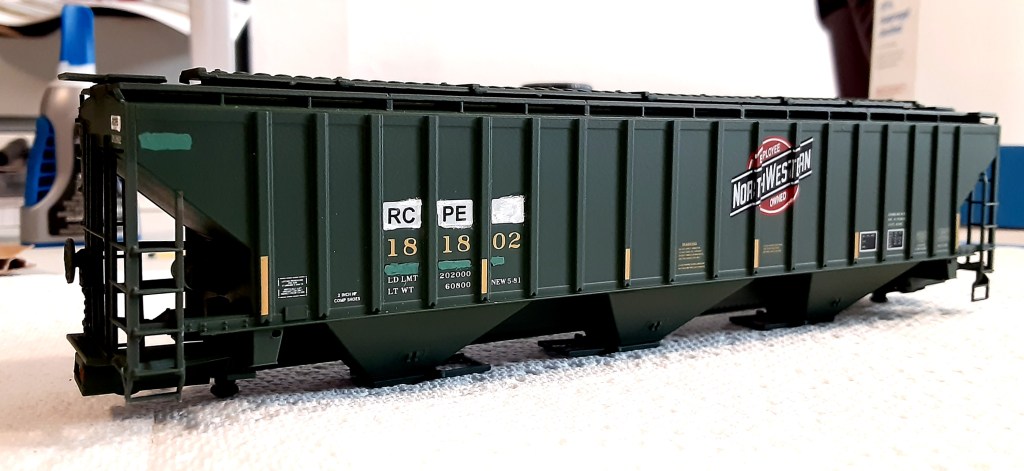
I next mixed up a small amount of an off-green color for the small patches below the road numbers and top corner of the side panel ends on each side. I used basic white and dark green acrylic craft paints to make the color. To apply the small patches I used a super fine microbrush, that had been previously used and I was able to remove the bristles easily to make a very fine point plastic applicator. Steady hands helped paint the patches. When they dried I used a #11 Xacto blade to gently scrape the edges square.
I cleaned up my plastic applicator made from the microbrush and applied a sheer coat of white craft paint around the reporting mark letters on the factory RCPE patches to create the imperfect look from the prototype image. Patience is definitely key while building up the paint to get the effect.
While I had the white paint going, I used the same applicator to hand draw the two small tag marks along the lower sill. I initially went too heavy, to correct that I went over the paint slowly with a #11 Xacto blade until I was happy. The second is just a bit taller than the prototype.
Wanting to let the paints fully dry, I turned to the hoppers next. I sprayed some RustOleum ultra flat camo brown on a cottonball and into a small paint cup for use later. I used the paint saturated cottonball to blot on some of the dark brown flat paint, this creates a randomized splatter pattern. I went around the hoppers then followed up with a Q Tip dipped in the paint cup of the same paint. I applied more in random blots where my cottonball couldn’t reach.

Once the applied paints had dried, I used A.I.M. dark earth powder and stippled in on the hoppers over the dry paint. This resulted in a layered effect with some texture. I worked the powders until satisfied with pattern and look. I also used the A.I.M. dark earth powder to create the wheel spray up the car ends.
I went back to the prototype image and began with the CNW logo, it needed to be faded. I used 600 grit sand paper to slowly take away the printed layers until it resembled the prototype image look. Then I started adding Bragdon soot powder to the car side in a similar pattern to the image. I had to use soot because the brown looked too brown against the dark CNW green. I was cautious to keep the powders off tge patches as the image shows they are relatively clean.
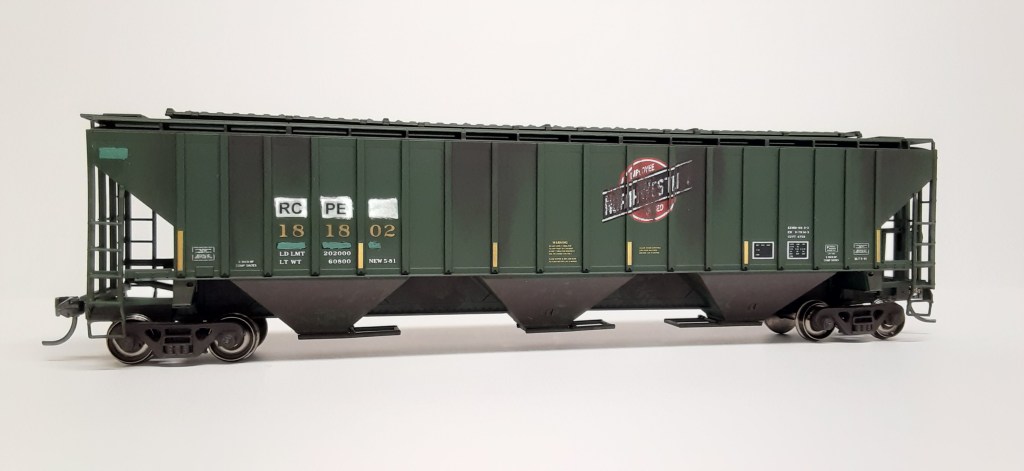
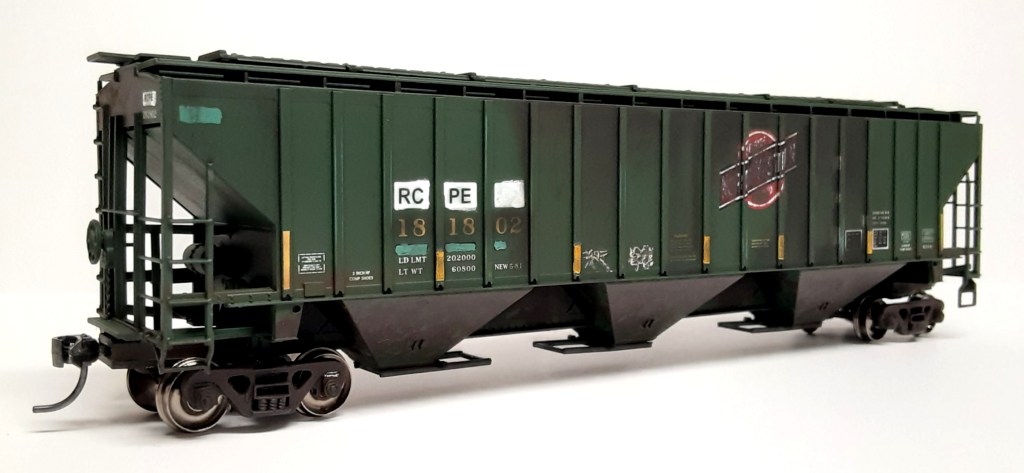
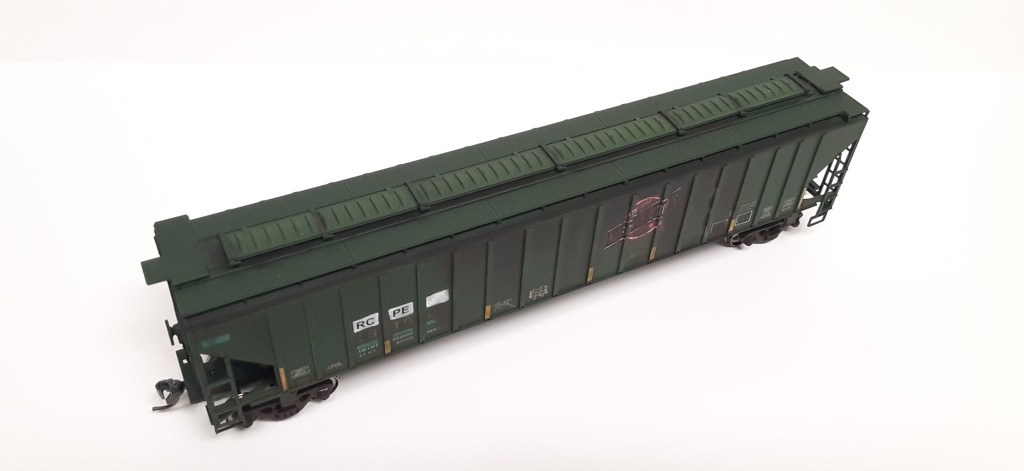
Now that the sides and ends were done I moved to the hatches and top. More Bragdon soot was applied along the flat surfaces, while the hatches received a medium dusting of Bragdon green grunge powder along with dark earth powder accents across the hatches. Unfortunately the green looks good in person as a subtle sun faded look, but the effect does not come across in photos well.
Now that I was happy with how the car looked I sealed everything with another medium coat of Tamiya TS-80 flat clear.
FINAL TOUCHES:
While the car body dried, I masked the back sides of the trucks and sprayed the faces with the same ultra flat camo brown RustOleum paint used underneath. This helps pull the trucks and underside together. I did not paint the wheels per the request of the car’s owner.
I reassembled the couplers and trucks then mounted them on the car and I called it good. Overall I’m happy with how this car came out, I always find a couple things to do differently on the next project and some new ideas will come to the surface too.